Styling Sarah Heeringa. Photography Amanda Reelick.
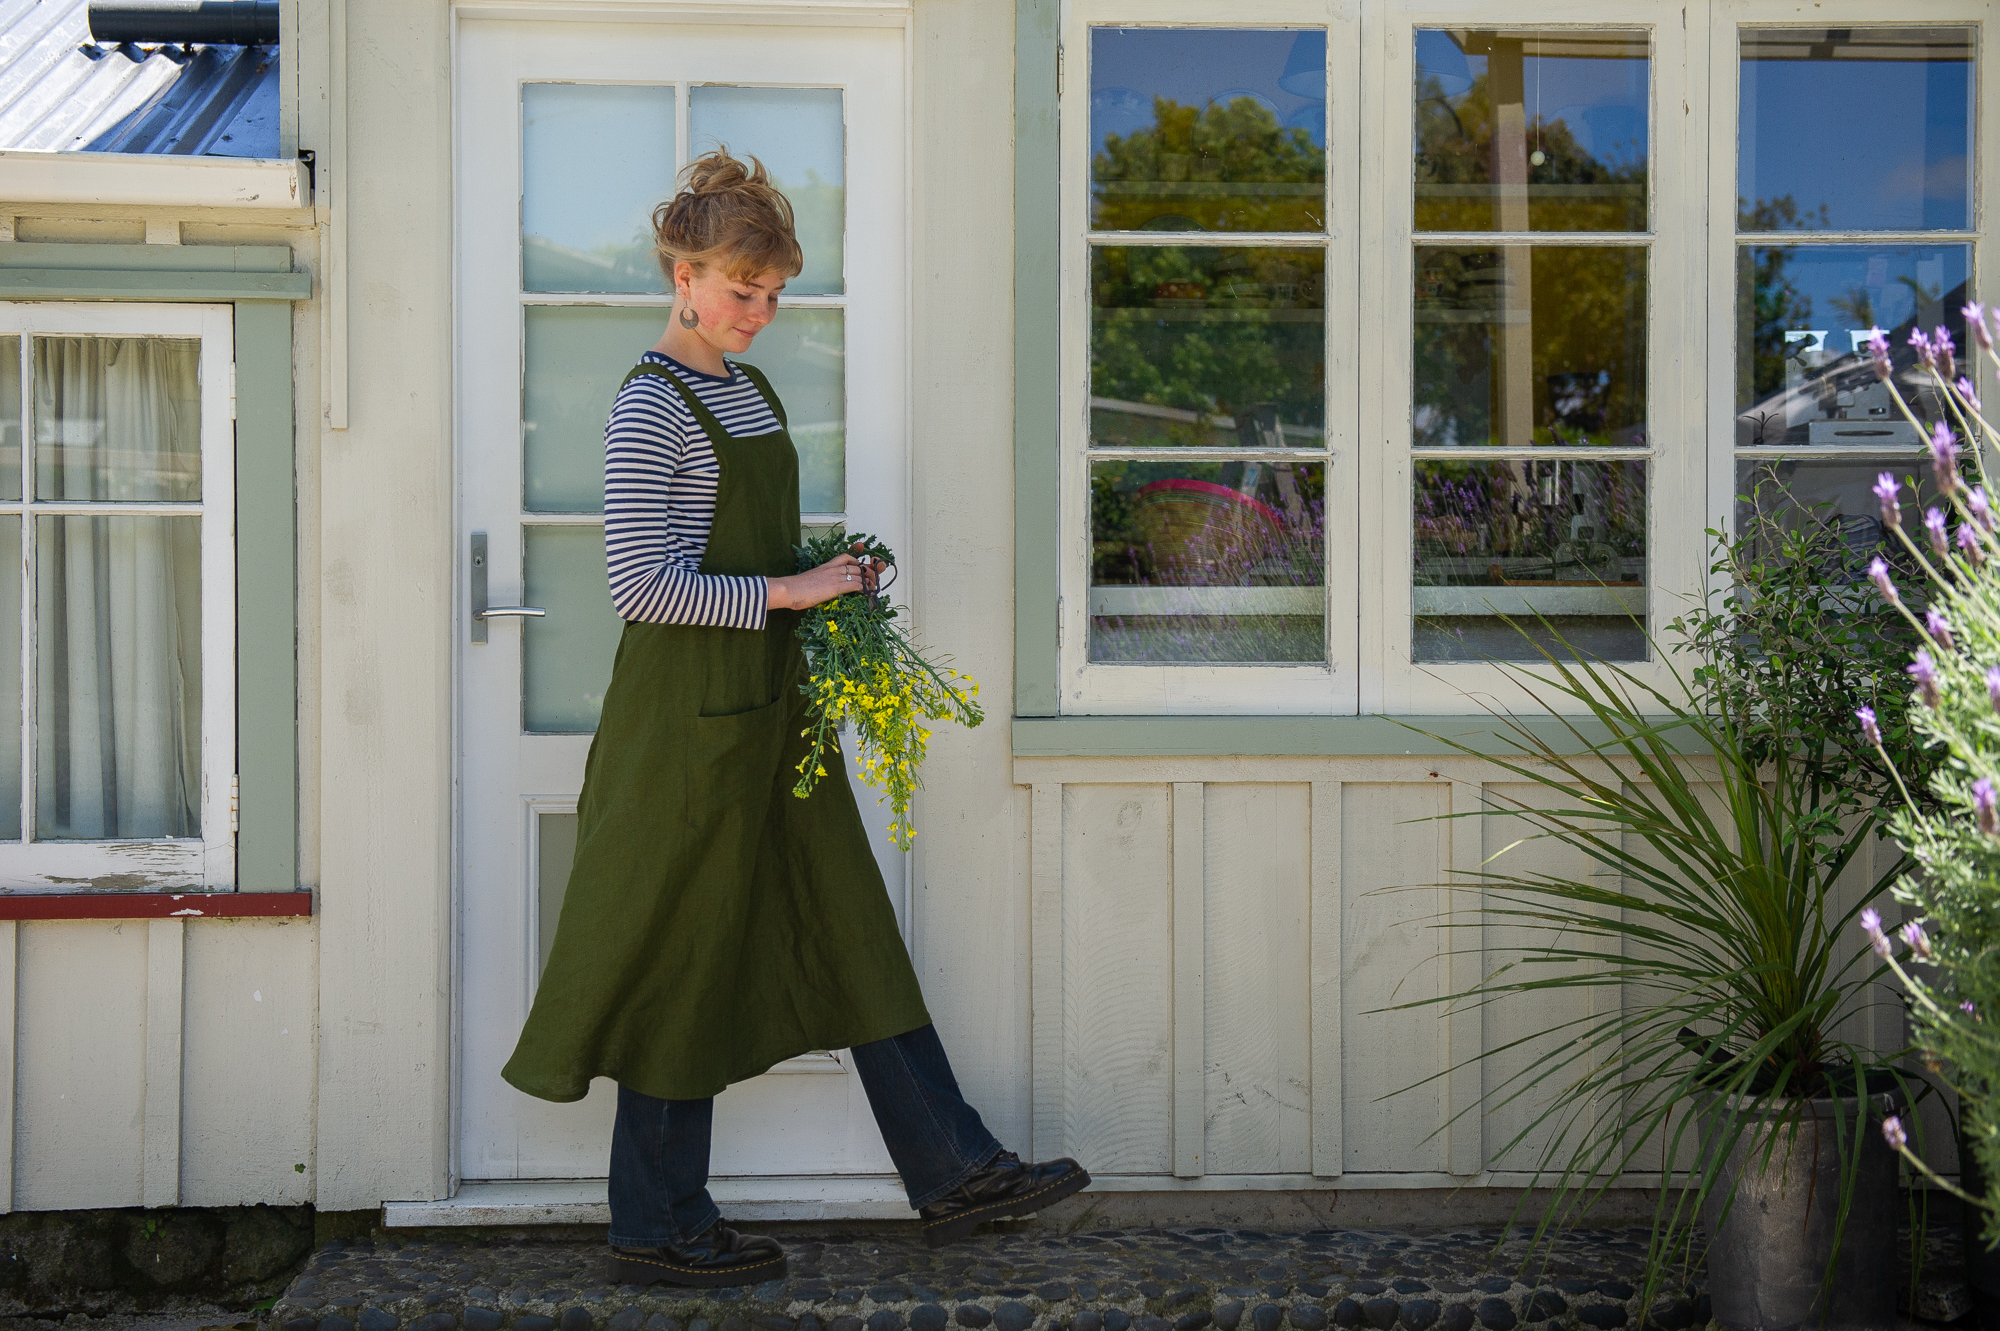
Whip up your own smart working tunic or simple dress.
The Tessuti Apron is a one-size-fits-all cross-back tunic. The sewing level is easy to moderate. Use the pattern to make a practical smock or use a light fabric and cut extra length for a simple drapey dress.
Materials
- Downloaded pattern (including font, bib facing, strap and pocket)
- Fabric (medium-weight linen, cotton or denim). For 112cm-wide fabric, you need 1.45m, for 140cm, use 1.10m. Add extra fabric for dress (left)
- Matching cotton thread
METHOD
Download the free pattern. Print it out on A4 and tape together before cutting. Read the instructions (a longer version can be found on the Tessuti website) thoroughly before beginning.
Step 1 – Attach pocket
Staystitch 0.6cm from top of pocket. Press towards wrong side at stitching line. Overlock side and bottom edges. Turn top edge down 2.5cm and topstitch in place. Press sides and bottom edges 1.3cm towards wrong side. Pin pocket to apron, following markings. Edgestitch around sides and bottom edge to attach.
Step 2 – Attach straps
With right sides facing, pin widest end of the straps to the apron back. Sew together with a 1.3cm seam allowance. Overlock seam allowances together and press towards apron.
Step 3 – Hem the apron and outer edge
Staystitch 0.6cm from bottom edge of apron and from outer edge and straps. Neaten the edges by finger-pressing towards wrong side. Turn again towards wrong side and edgestitch in place. Press.
Step 4 – Prepare armhole edge and sew inner edge of strap
Staystitch 0.6cm from armhole edge of the apron and inner edge of the straps. Neaten edge by finger-pressing towards wrong side. Turn the neatened inner edges of the straps only towards the wrong side and edgestitch in place. Press. Leave the neatened armhole edges raw.
Step 5 – Attach straps to apron front
With the right side of the apron facing you, cross one strap over another and bring the ends to meet the top edge of the apron front, so the left-hand strap meets right-hand apron front and vice versa. Make sure the outer edge of the strap is 0.6cm in from the armhole edge! Sew strap to apron front with 0.6cm seam allowance.
Step 6 – Attach the facing
Staystitch 0.6cm from unnotched edge of bib facing. Neaten by finger-pressing towards the wrong side. Press. With right sides facing, pin bib facing to top edge of apron front, matching notches. Note: bib facing will extend 0.6cm past neatened armhole edge of apron front. Sew with a 0.6cm seam allowance along top edge. Turn facing out away from apron with seam allowance towards facing. Understitch on right side of facing, close to seam and making sure to catch the seam allowance at the back. Turn right side of facing back over to face right side of apron, making sure seam allowance is towards facing, pin in place. Sew 0.6cm seam allowance from outer edges of facing. Turn facing and straps to right side.
Note: when facing is turned out, armhole edge should be double turned.
Step 7 – Hem armhole edge and bottom edge of facing
Starting/finishing at seam where strap joins apron, turn neatened armhole edges towards wrong side and pin in place. Pin facing in place along neatened bottom edge. On wrong side, edgestitch armhole edges and facing in place from seam where strap joins back of apron. Pivot at bib facing and backstitch to armhole edge. Continue to edgestitch across facing to opposite armhole edge, backstitch to 0.6cm from armhole edge, then pivot and continue to finish at opposite seam where strap joins apron. Press. Wear and enjoy!