Styling Sarah Heeringa. Photography Amanda Reelick
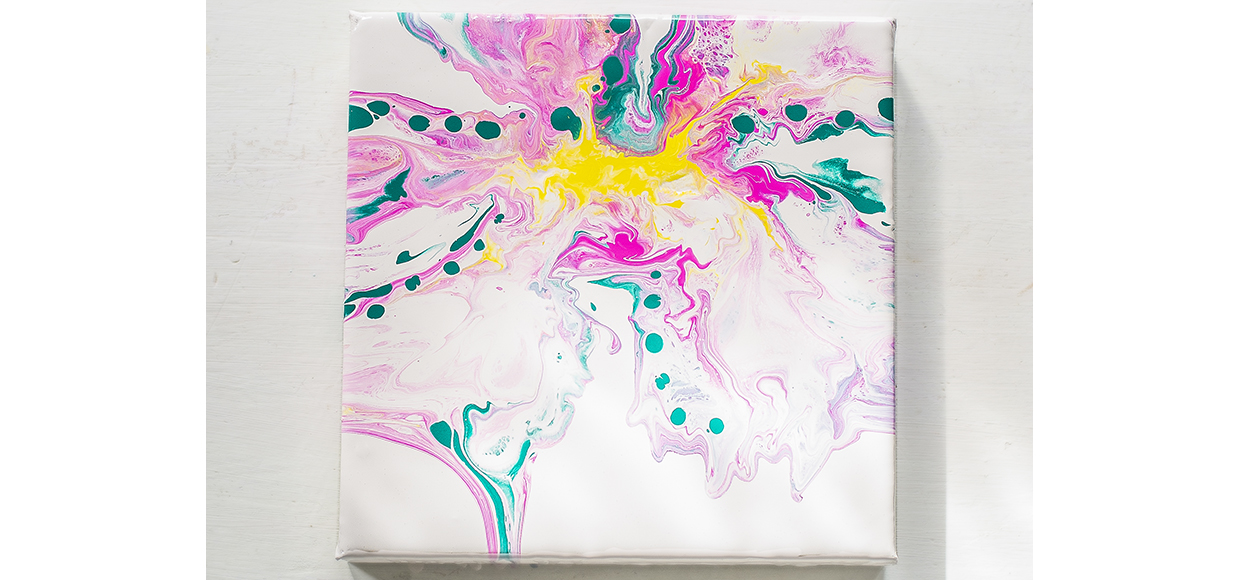
Acrylic pouring is a fun way to get your creativity flowing and make something beautiful. This technique involves pouring fluid paint onto the canvas then using a straw to move it around. Use Resene testpots diluted with a little water, mixed very well to create a flowing paint. I used Resene Alabaster, Resene Mother Earth, Resene Smitten and Resene Quarter Turbo.
You will need
• Several sheets of paper and a dropcloth
• 4 jars of equal size
• Painting canvas
• 4 Resene testpots – we used Resene Alabaster, Resene Mother Earth, Resene Smitten and Resene Quarter Turbo
• 4 tin cans, empty and clean
• 4 small plastic spoons and 1 plastic knife
• Paper straw
Method
Step 1: Lay out several layers of paper covered by a drop cloth. Set down jars and balance the canvas evenly on top.
Step 2: Add 2-3 spoonfuls of Resene paint to each tin. Adding a little water at a time, use the spoons to mix each colour to a smooth, pourable consistency. Be sure to mix well.
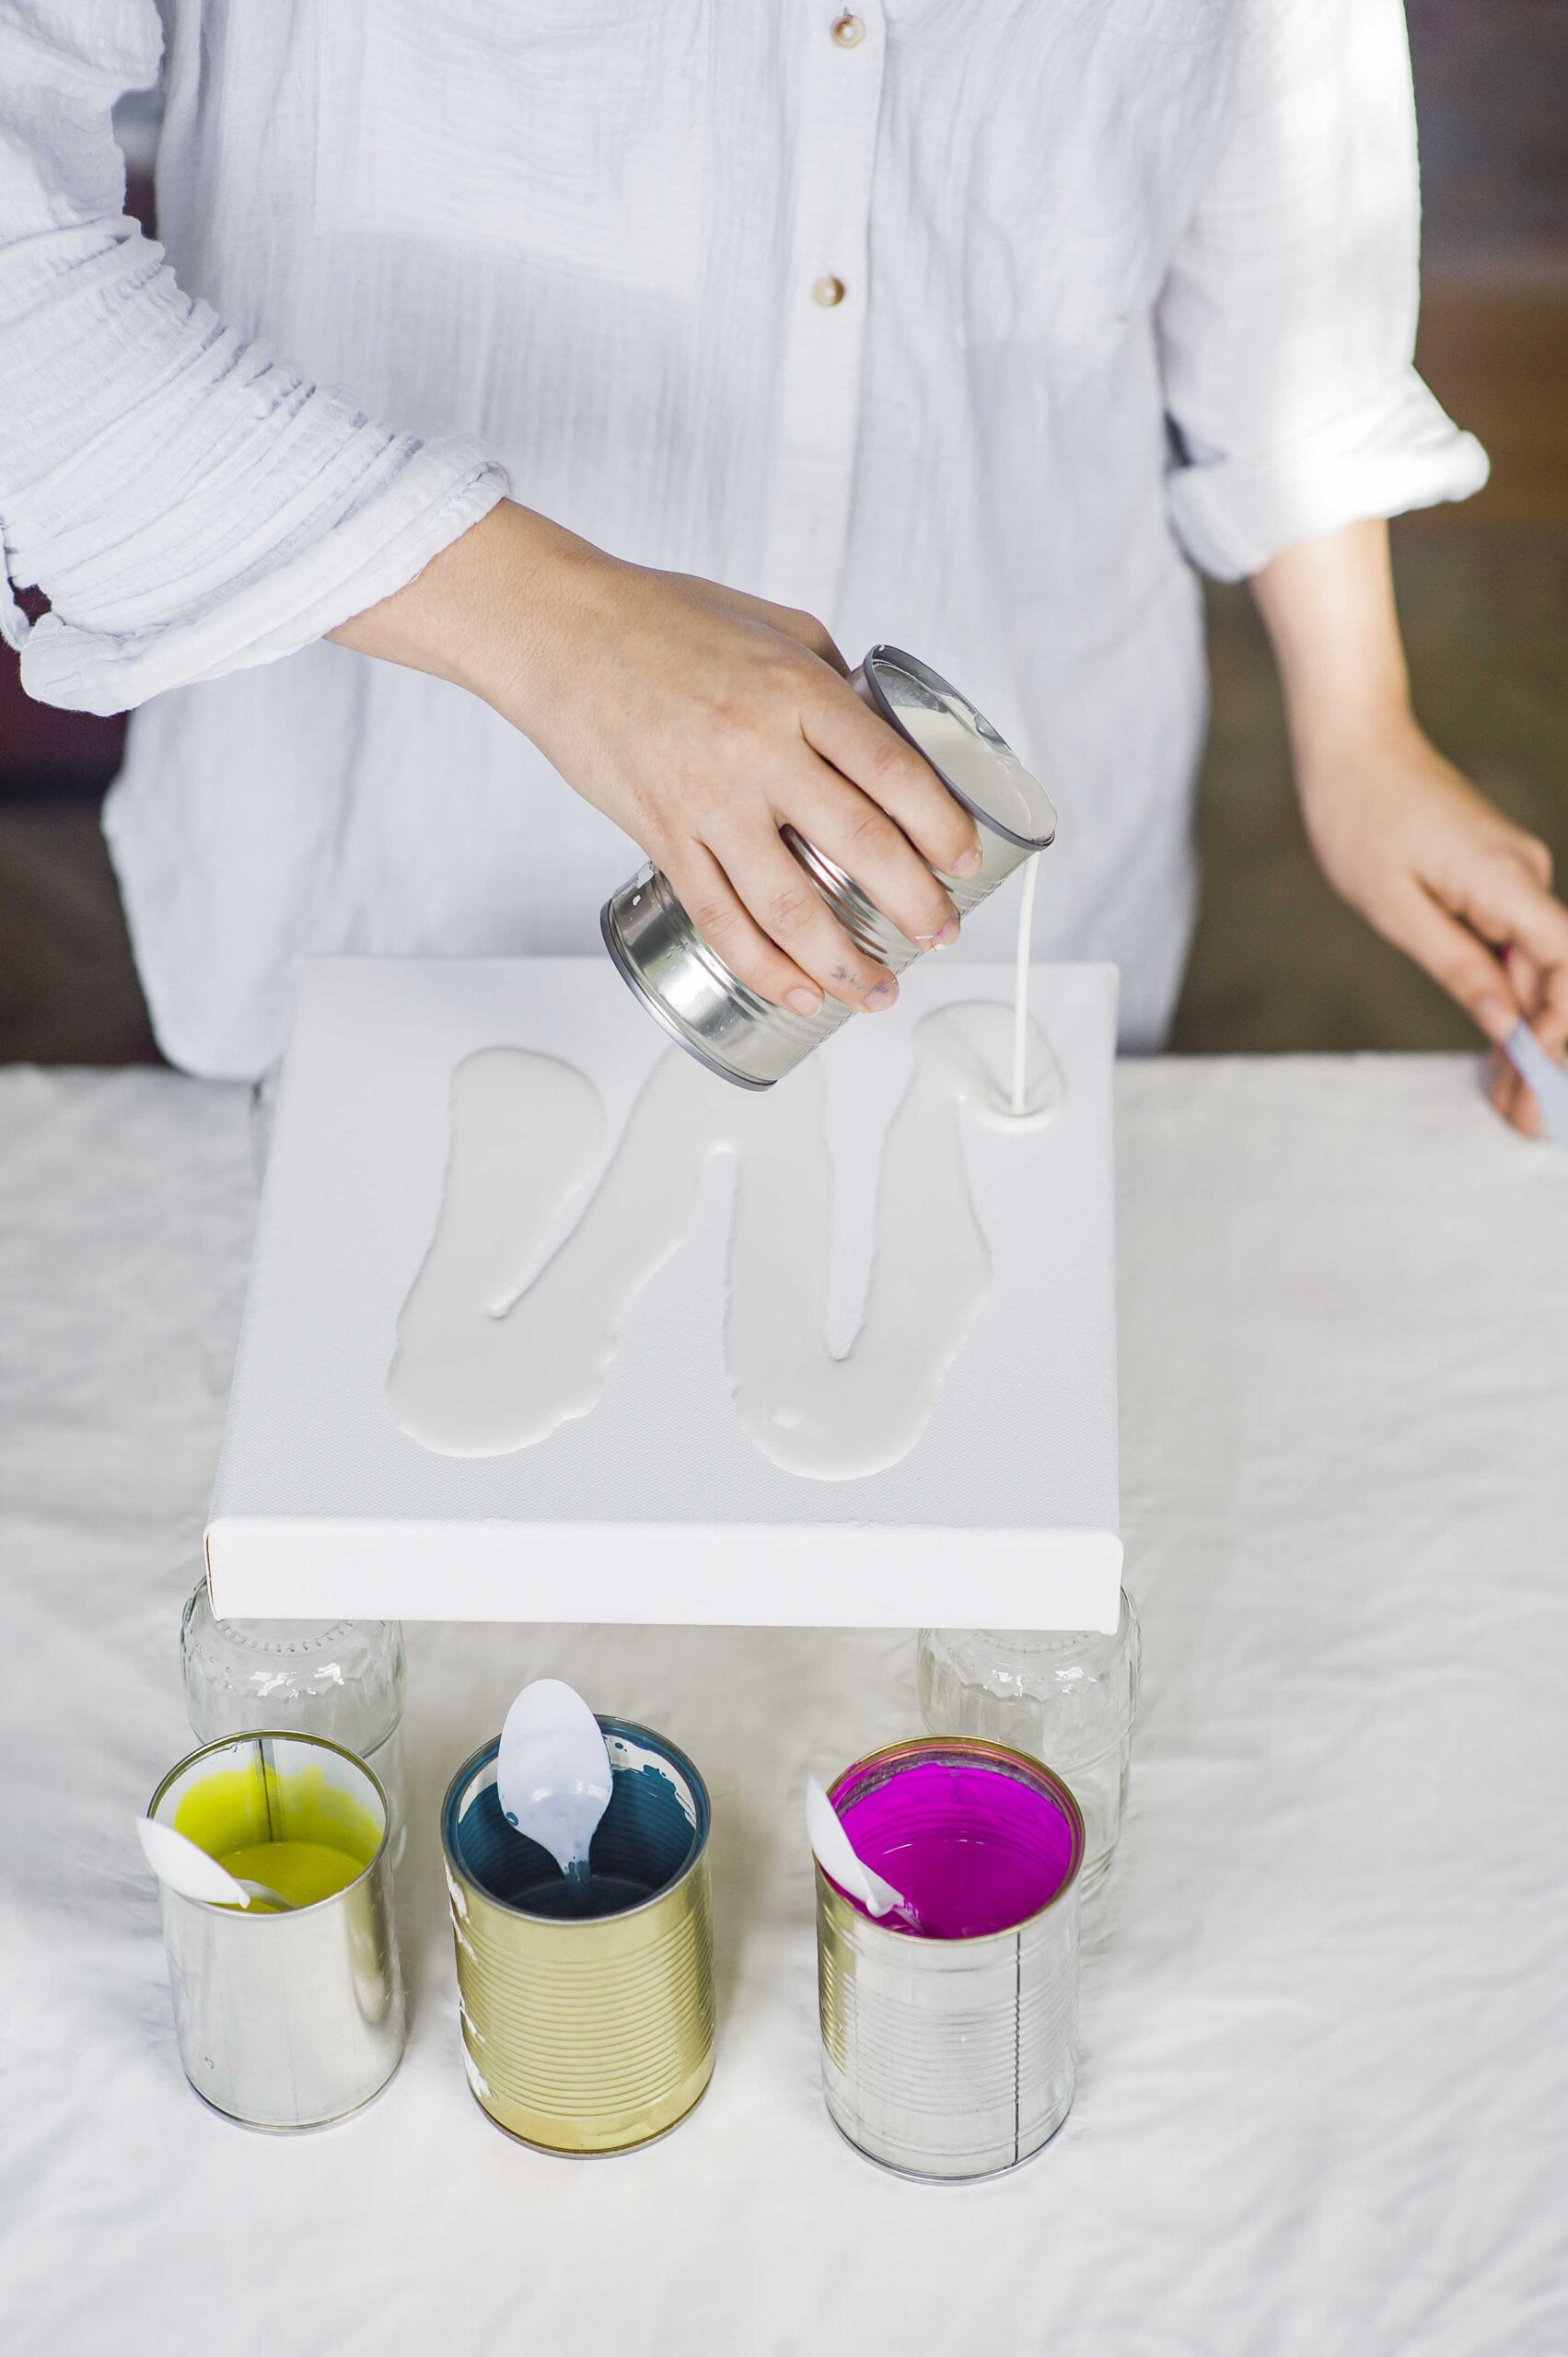
Step 3: Create a neutral base by pouring the Resene Alabaster paint onto the canvas, spreading it out with the knife.
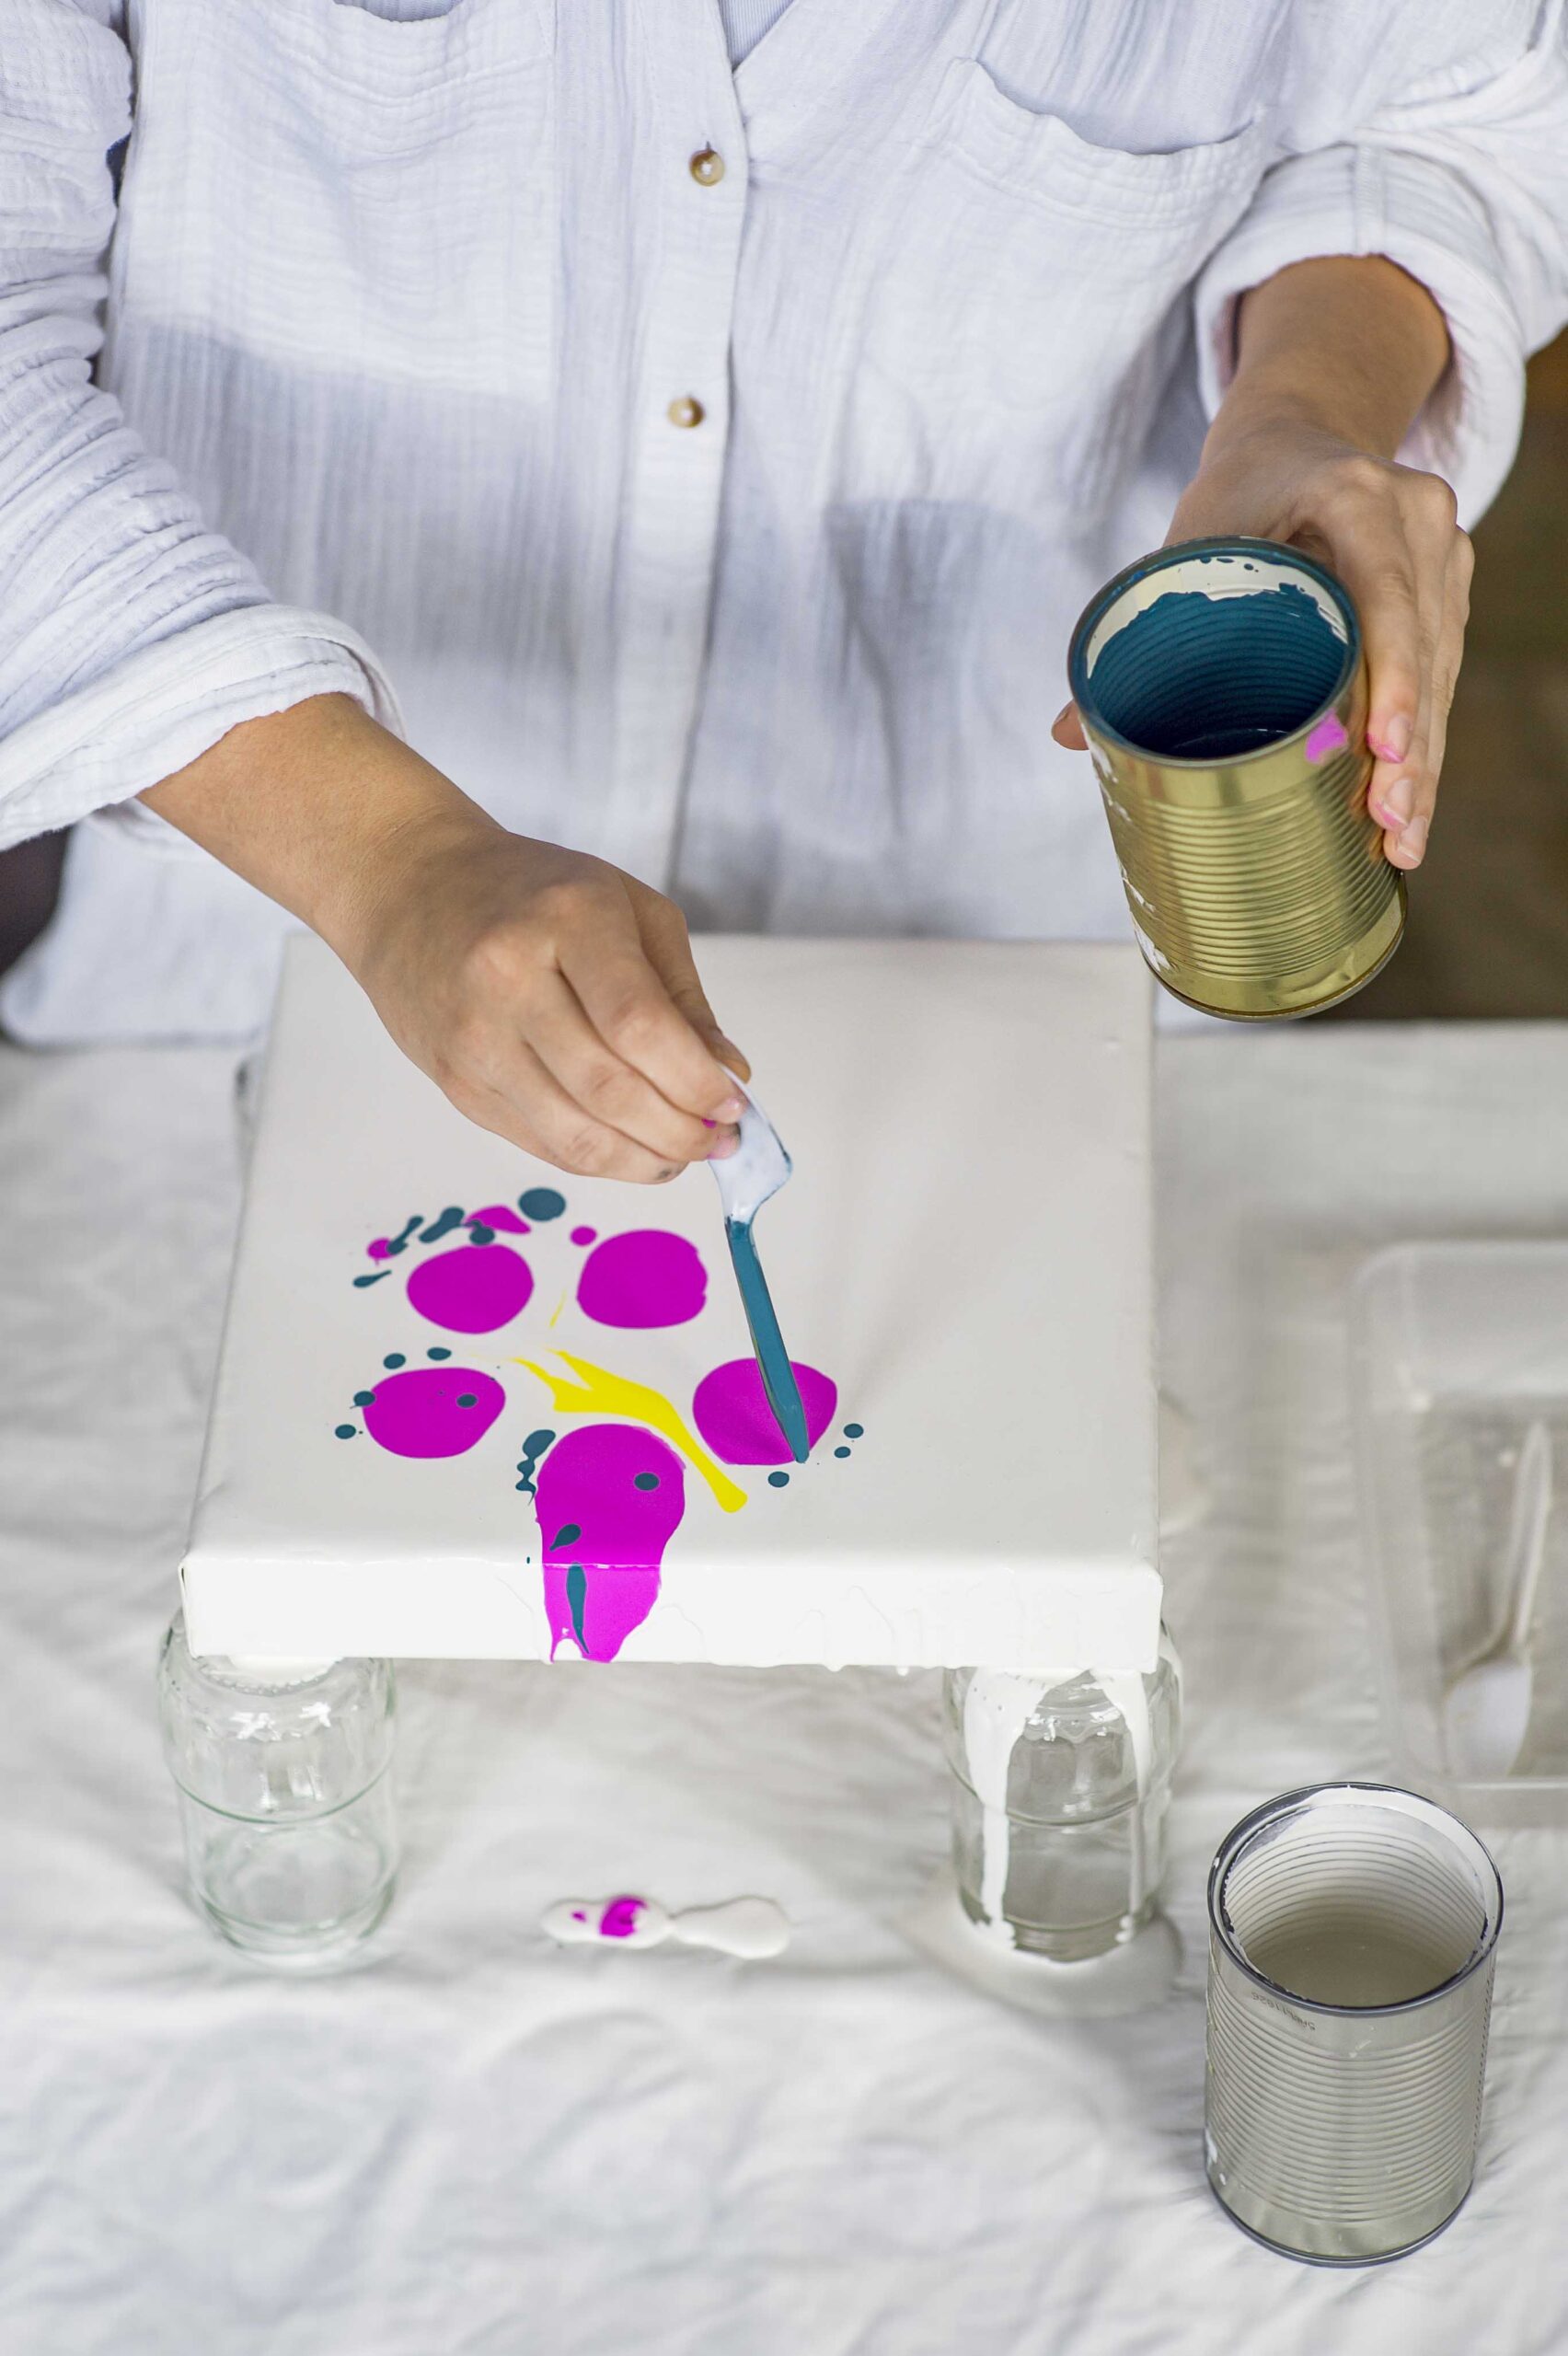
Step 4: Decide where the centre of the flower will be. Spoon 1-2 spoons of Resene Quarter Turbo onto that spot. Add 2-3 spoonfuls of Resene Smitten around the Resene Quarter Turbo, where you want each petal. Add smaller green drips around the outside edge of each petal.
Step 5: Blow into the straw to gently move the Resene Smitten paint of each petal towards the Resene Quarter Turbo centre, then move around the canvas blowing the Resene Smitten paint from middle of each petal outwards. Spread the paint across the canvas, allowing it to dribble down the sides in places.
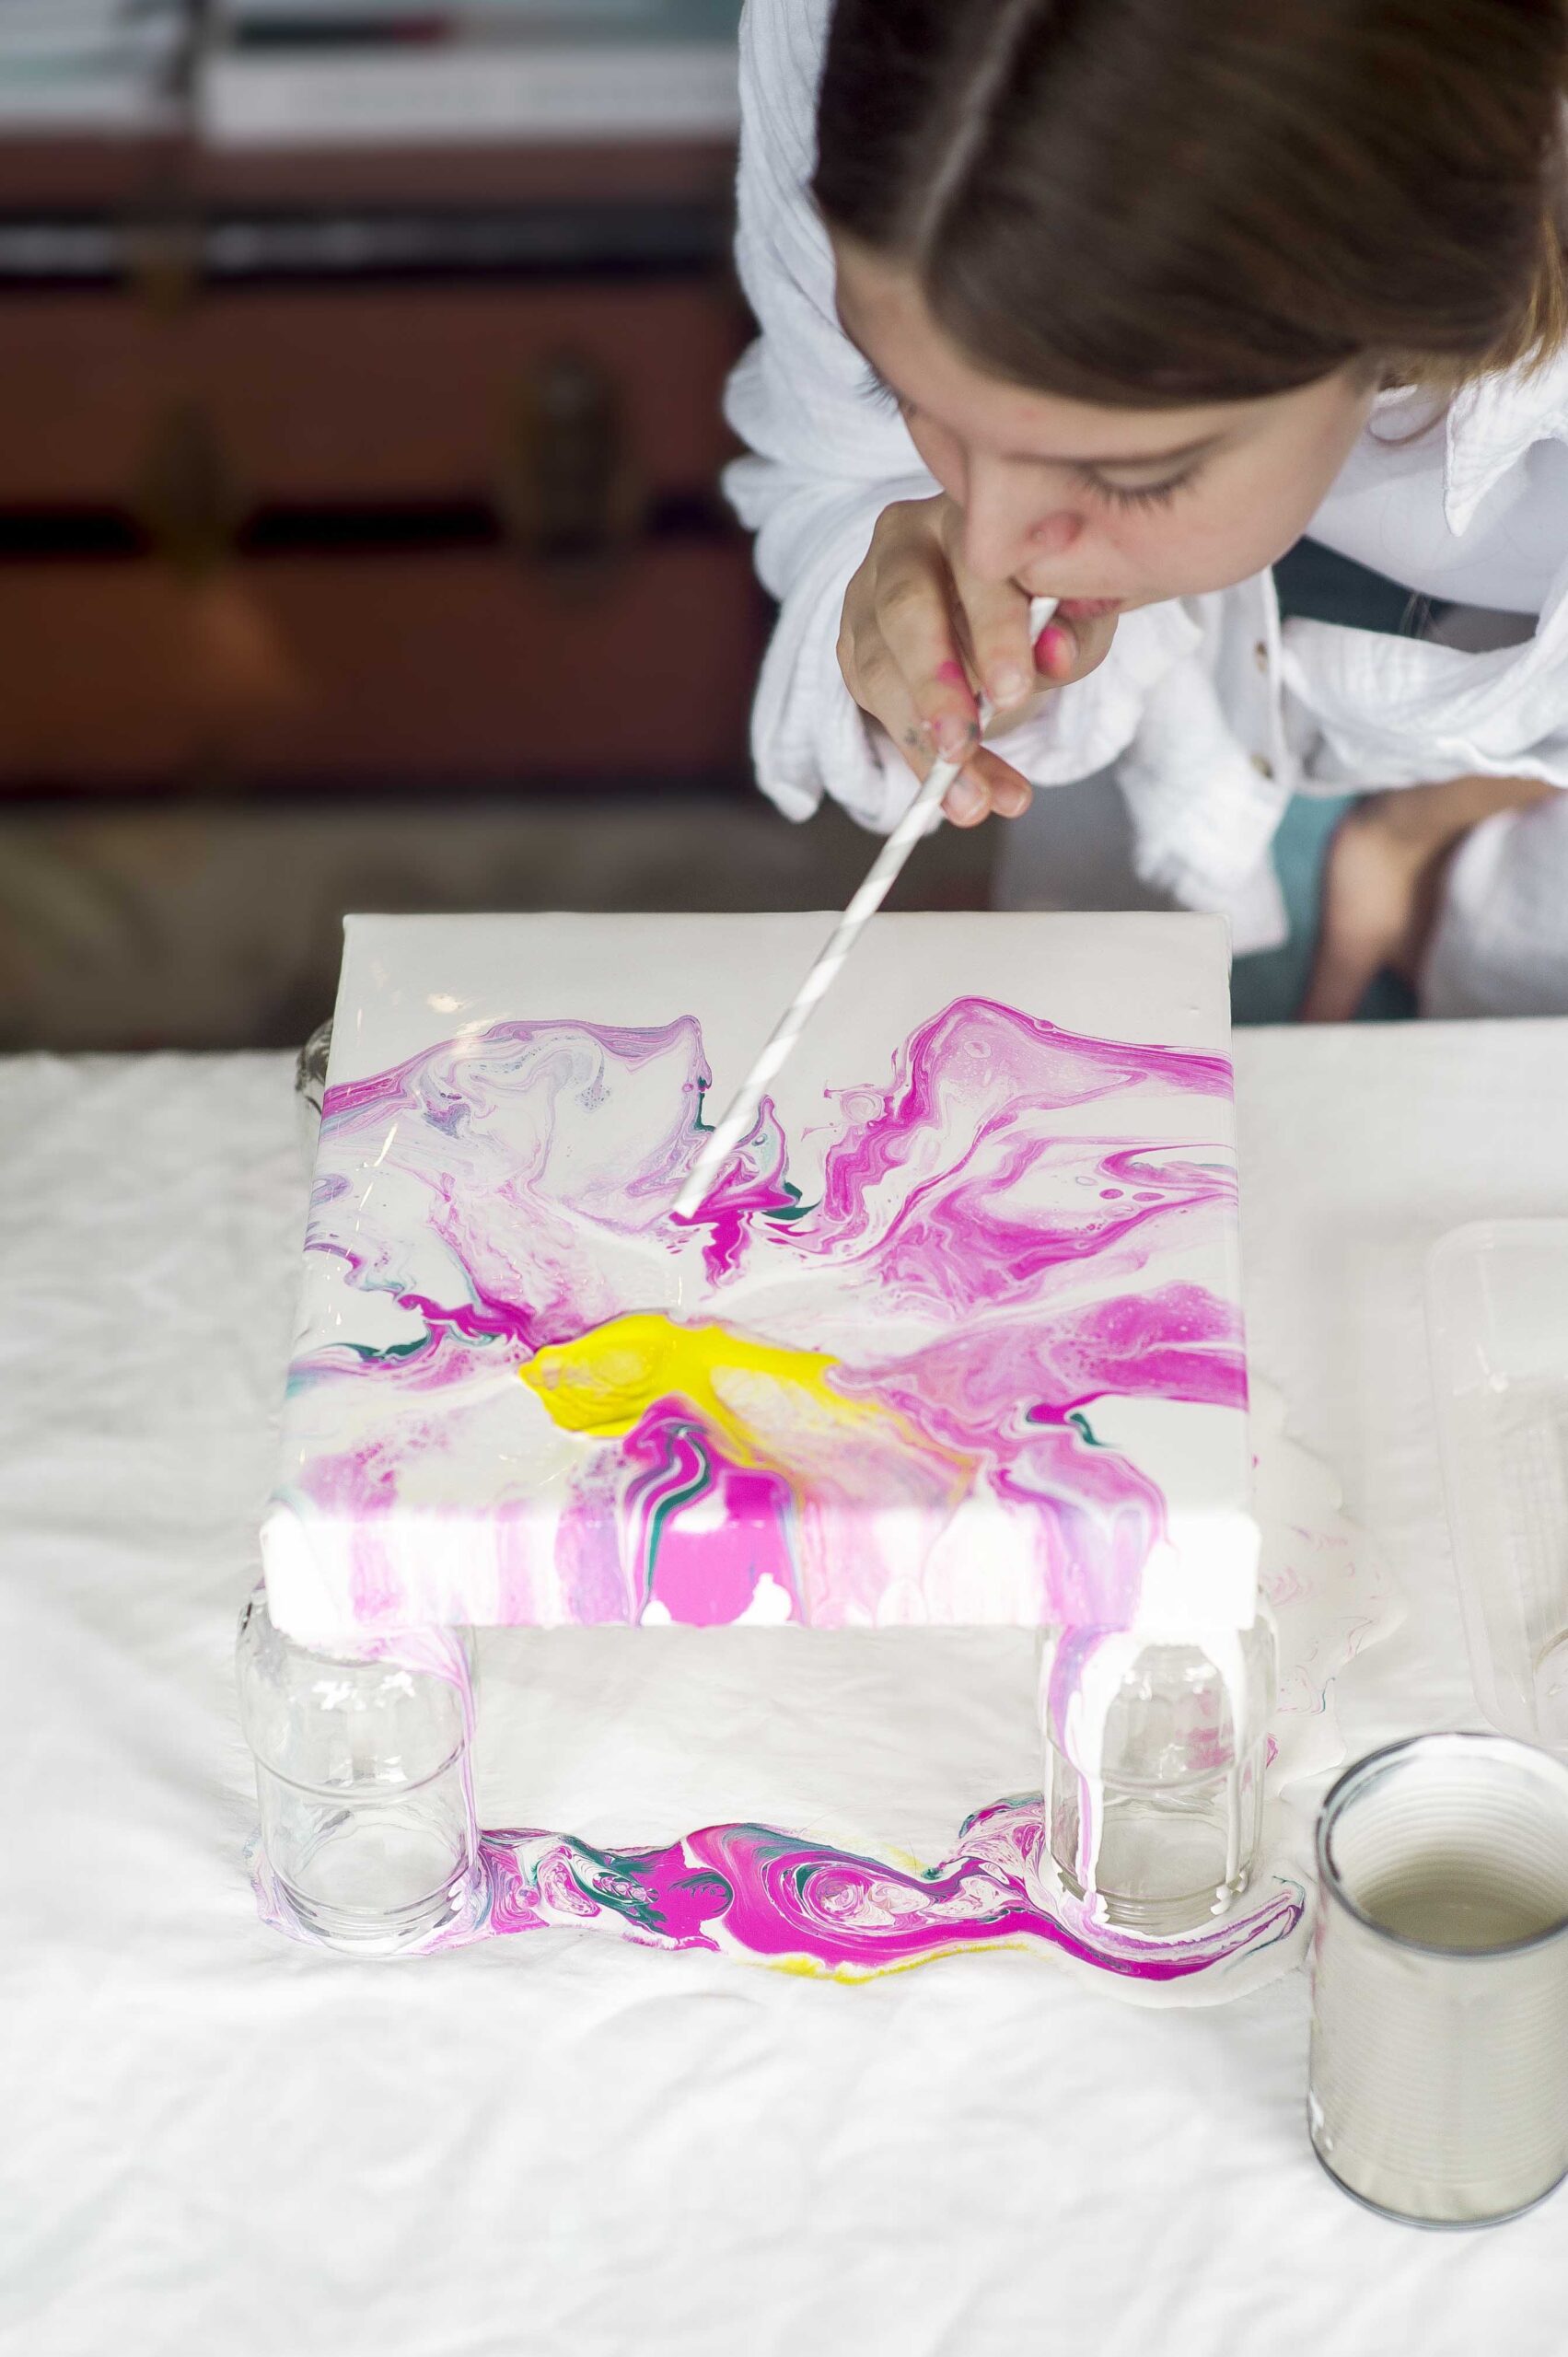
Step 6: Blow into the middle of the flower to spread the Resene Quarter Turbo centre. Add more Resene Quarter Turbo if necessary.
Step 7: Use the back of your Resene Alabaster spoon to fill in any spaces. Add detail dots using the end of the knife to make drips.
Step 8: Let your artwork dry, undisturbed, for at least 24 hours, then hang and enjoy!