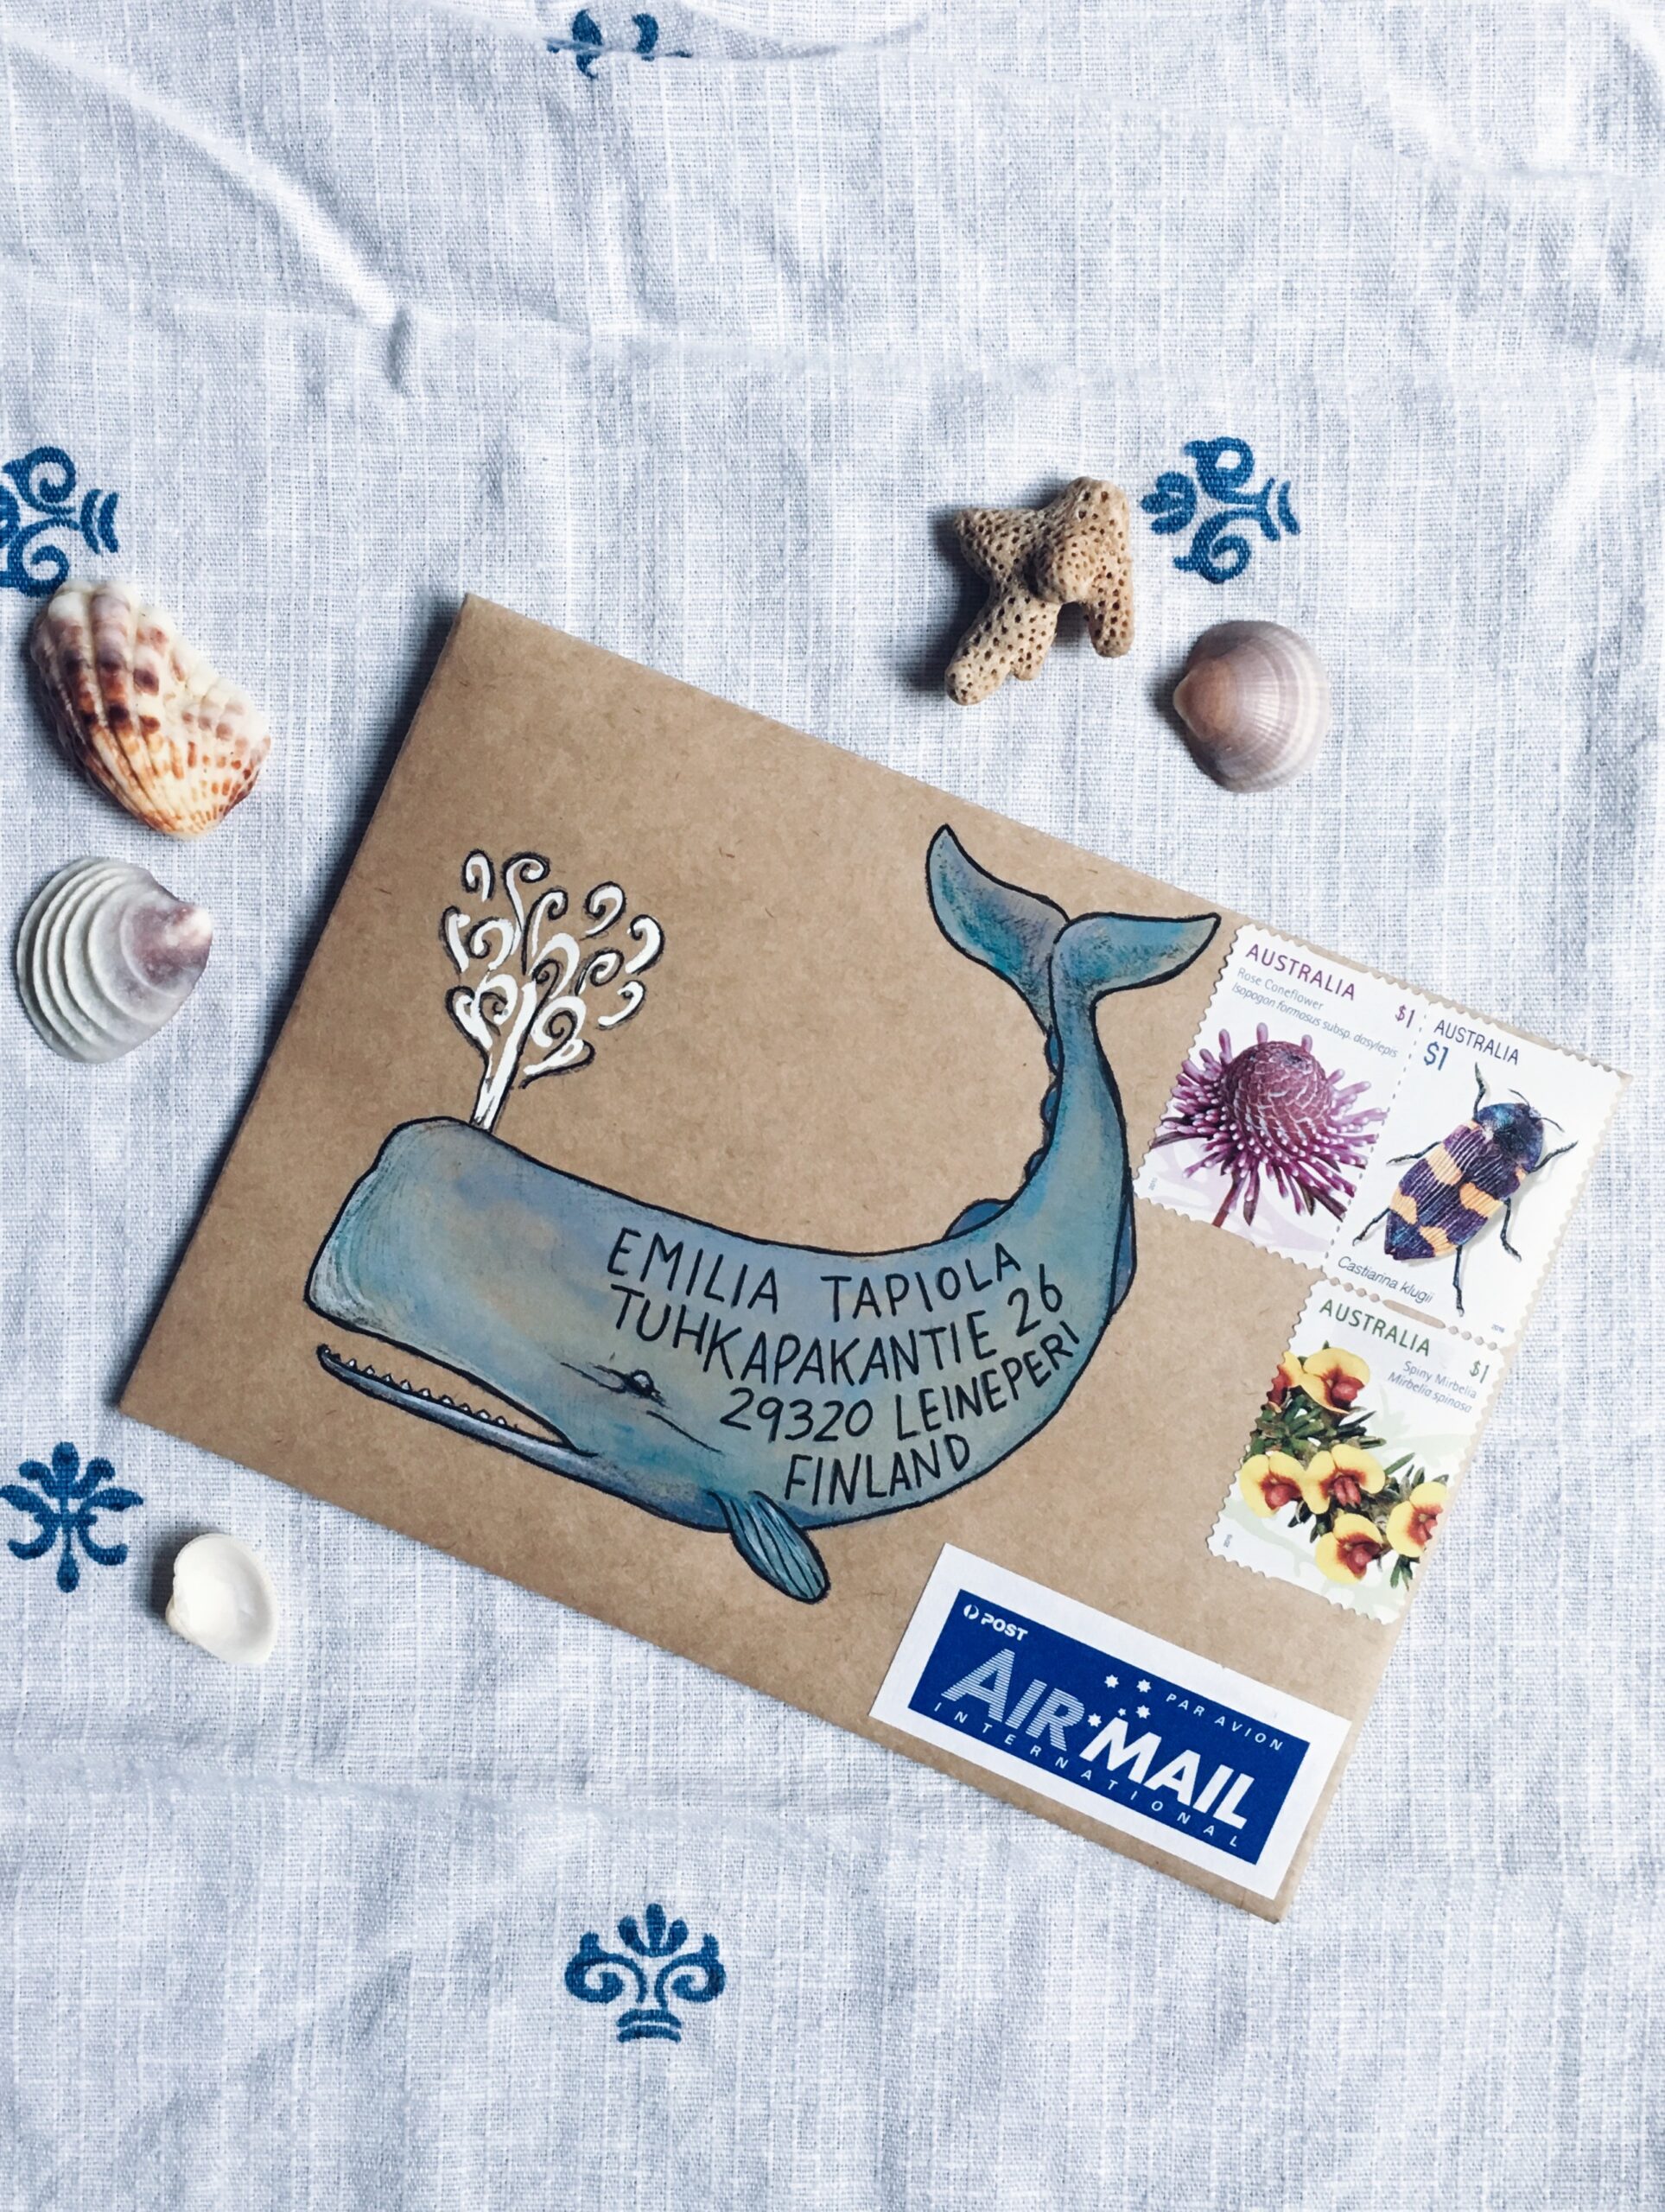
As long as the address is clear and you have enough postage, the only limit is your imagination. Naomi Bulger shares her tips and tricks for creating decorative mail.
Words and photography Naomi Bulger
You don’t need to be an artist to send mail-art; there are plenty of ways you can make your letter the kind of mail that gives joy to the recipient and the postie, without needing a degree in fine-arts.
If you feel confident, draw a picture with the address on the envelope. You could make this a picture that stands next to the address, or actually incorporate the address into your design. I find speech bubbles, signs, flags and oversized leaves are all good design elements to incorporate into a drawing, on which to write the address. You may even want to colour or paint your design to make it extra special.
Of course, not everyone likes to draw, colour and paint, but there are plenty of other ways to make your mail look special. For example:
· Cut out pictures from magazines to create a collage around or incorporating the address
· Use rubber stamps or stickers to decorate your envelope
· Make mail colourful with stripes or patterns of washi tape
· Paste vintage stamps alongside real stamps to decorate your mail
· I like to include a wax seal on many of my envelopes, if there is room for it. Buy sealing wax and seals at specialty stationery shops or order them online
· That old favourite, “brown paper packages tied up with string,” is still a crowd pleaser (although I’m told string is not accepted in the US mail so you might want to check with your local post office first).
Mail-art that makes it
One of the dangers of making mail-art is that anything ‘not standard’ runs the risk of not making it through the postal system. An artistically designed address can’t be read by machines. Here are some tips for creating mail-art that is more likely to survive its journey through the post.
· Make sure the address is clearly visible to the postie. Sometimes I leave messages for the postie, along the lines of “Kindly deliver to”, to draw attention to the address.
· My local postie once told me to make sure the country was in the same place as the rest of the address to be sure it wouldn’t be missed. Postal workers are busy, they don’t always have time to search over a complex picture.
· If you’re using paint, be aware that water-based paints might run if your letter is delivered in the rain. I still use watercolours and gouache in the mail I send, but I outline everything – especially the addresses – in waterproof felt-tip pen, so that the details are clear, no matter what.
· Depending on how bulky or heavy my letter is, sometimes I reinforce each of the corners with sticky-tape so that it’s not so likely to become torn in the mail.
· Make your return address bold and clear so that if the postie does get confused, at least they can send the letter back to you.
· If you’re using stamps rather than postal labels and they won’t all fit on the front of your envelope without ruining your design, it’s okay to put more on the back. Just leave a note for the postie: “more stamps over” with a little arrow pointing them in the direction of the extra stamps.
· If you do put stamps on the back of the envelope, write “Sender” above your return address, so they don’t confuse it for the recipient’s address (that actually happened to me!).
Despite all this care, sometimes your letter will still arrive bruised and battered, or even torn. Don’t let it distress you overly. See any wear and tear as marks of the journey, of the great adventure that your mail has taken across land and sea.
The original mail-artists of the ‘60s and ‘70s believed this was a kind of participatory art process: a collaboration between the original artist (you) and the entire postal system!
Download your Kiwi mail art template here, and your Books mail art template here.
This is an excerpt from Naomi’s e-book Making Mail: 10 steps to writing letters that become keepsakes. You can download the e-book for free via her blog naomiloves.com/making-mail-e-book


