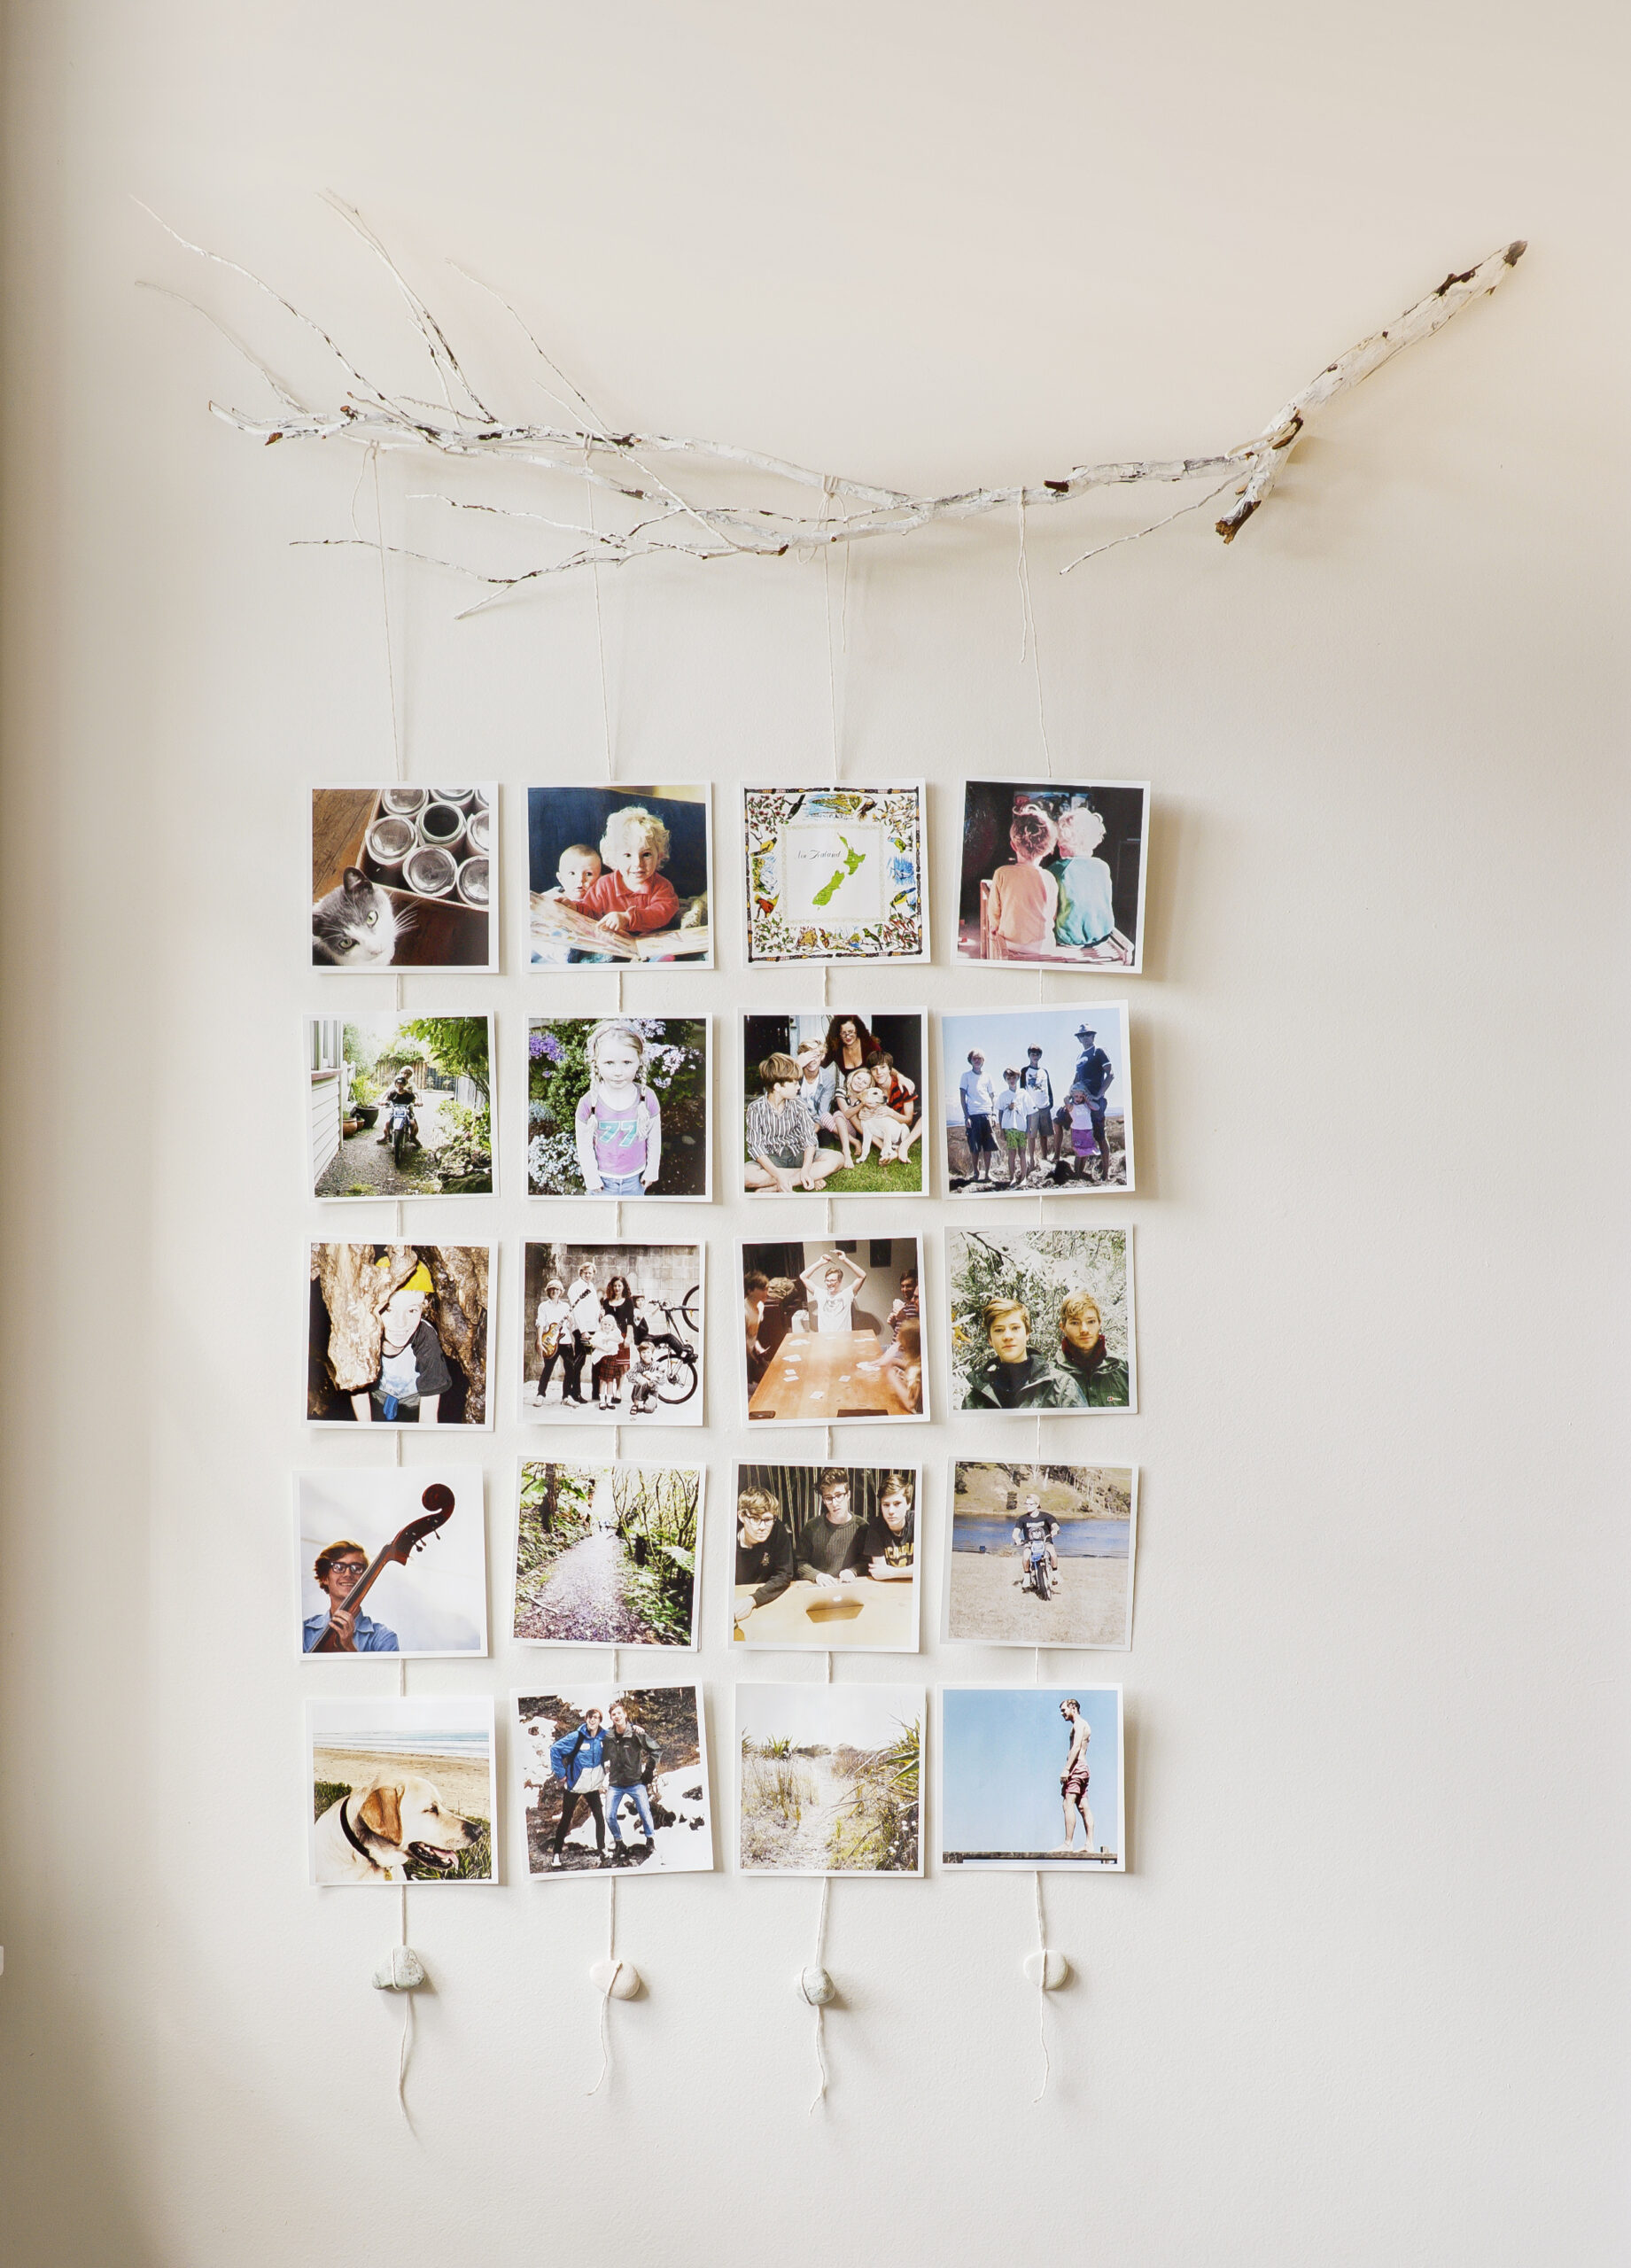
Enjoy your favourite photos every day with this crafty framing project
Words and styling Sarah Heeringa. Photography Amanda Reelick.
You will need
Up to 20 square photographs (all 10cm x 10cm) · white card, medium thickness, cut into squares (8cm x 8cm) · white string · spray adhesive or glue stick · scissors and ruler · A branch or length of bamboo (paint white if you wish) · 1 metre of nylon line · small stones (optional) · Blu-Tack
Step 1: Prepare and print images Adjust the photographs before printing to ensure they are of a similar tonal range. Open each image using a photo editing tool and using the saturation function, desaturate each one to strip out any intense shades. Alternatively, apply the same photo filter to each image or print them in sepia or black and white. Some stores can print photos in
a square format with white borders, so check for this option. Alternatively, trim regular rectangular prints down to size and mount them on slightly larger white card for a
similar effect.
Step 2: Arrange in order Lay photos out on a large flat surface in vertical columns to form a grid, allowing a 2cm space between each photo vertically. Arrange images into a pleasing composition, checking for a balance of subjects, shapes and colours. Turn each photo over, maintaining the grid arrangement.
Step 3: Attach strings Cut strings the length of each vertical column plus an extra 50cm. Lay the strings along the middle of each vertical column, with 30cm of the extra string at the top and 20cm at the bottom. One at a time, lay each white card on clean scrap paper and lightly coat one side with glue. Starting at the top left corner of your grid, place each card, sticky side down, onto the back of each photograph, sandwiching the string in between. Use a ruler to ensure the photos are evenly spaced on the string and line up with the corresponding photo on either side. Leave to dry.
Step 4: Assembling photo wall Attach the nylon line to the stick ends and hang it horizontally on the wall. Attach each photo string to the stick, ensuring the images line up by first attaching each top photo to the wall using Blu-Tack and then tying the string to the stick above. If you like, tie a small stone to the bottom of each string.


