Author Geraldine Tew is the founder of The ReCreators, a Social Enterprise based in Auckland, New Zealand, which promotes up-cycling, supports local artisans, and runs DIY workshops.
Buying gifts can be expensive, and often involves the use of unnecessary resources like plastic packaging.
Here are ten easy ideas for gifts or home décor which are great alternatives to purchasing new. They encourage us to live with less waste, as well as appreciate experiences over material things.
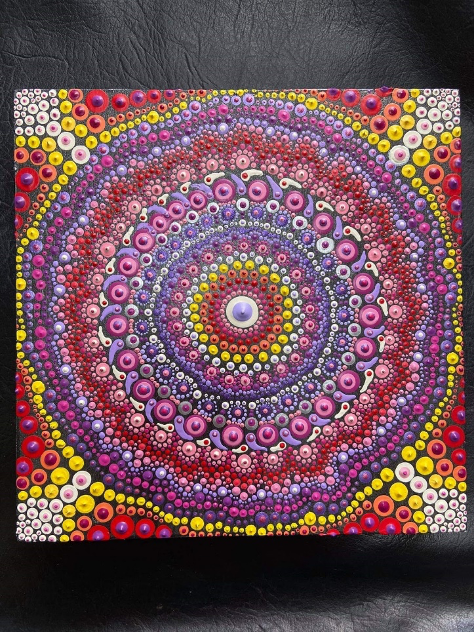
Canvas Art
What you will need:
- 4 Wooden block offcuts (2 pairs of same size)
- Linen fabric
- Staple Gun
- Scissors
- Paint and brushes
Method
- Match 2 pairs of identical equal lengths of wood.
- Mark out drill holes, pre drill and screw together to make a rectangular or square frame.
- Cut linen so that it can wrap around
- Using a staple gun, tighten as much as possible around the edges and staple the whole way round. Trim the edges on the inside.
- Check out our Dot Art video for ideas on what to create as your masterpiece!!
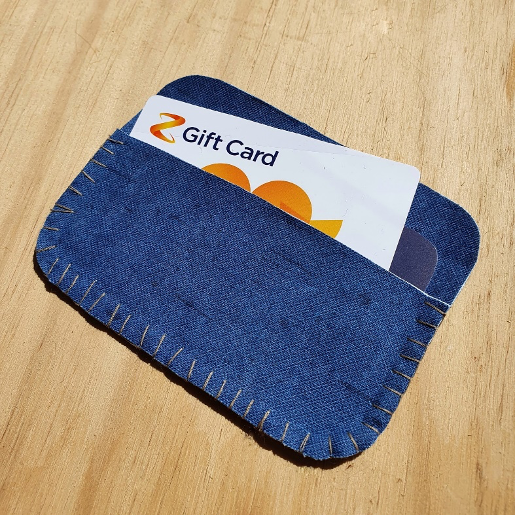
Denim Wallet (perfect for storing gift cards)
What you will need:
- Denim jeans
- Fabric Scissors
- Fabric glue
- Hand Sewing Kit
Method
- You want to use a thin coating of glue to attach two pieces of denim fabric together. This will make your wallet more sturdy.
- Draw a slightly bigger size of your gift card.
- Cut the second piece 1 cm longer and ⅓ shorter so that you can easily slip the gift card inside the wallet.
- Place the fabric together, lining the bottom edge together and checking that the pocket looks straight.
- Neatly trim the edges of the fabric so that the wallet looks tidy. Rounding the edges for a neater look.
- Start sewing from the right side of the wallet where the pocket begins. You want to use a blanket stitch around the pocket.
Optional: Add any designs you would like to decorate the wallet or leave it for a simple finish.
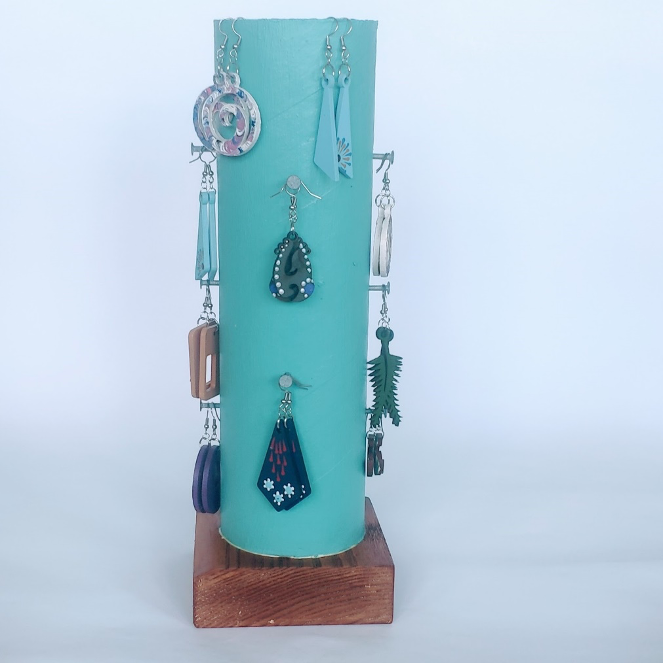
Jewellery Stand
What you will need:
- Cardboard Cylinder
- Craft Knife
- Paint
- Hammer
- Nails
- Wooden off cut
- Wood Glue
- Stain (optional)
Method
1. Using the craft knife, cut to your desired length (10-20cm)
2. Paint the cylinder your desired colour. Why not add dot art or finger painting to add texture. Stain or paint your wood, you can rag off to show through the wood grain.
3. Using a method of equal distribution (using your jewellery sizing as guidance) mark where you want the nails to be place
4. Hammer in the nails one at a time
5. Glue the wood to the cylinder and leave for 24 hours to dry
6. Display your jewellery
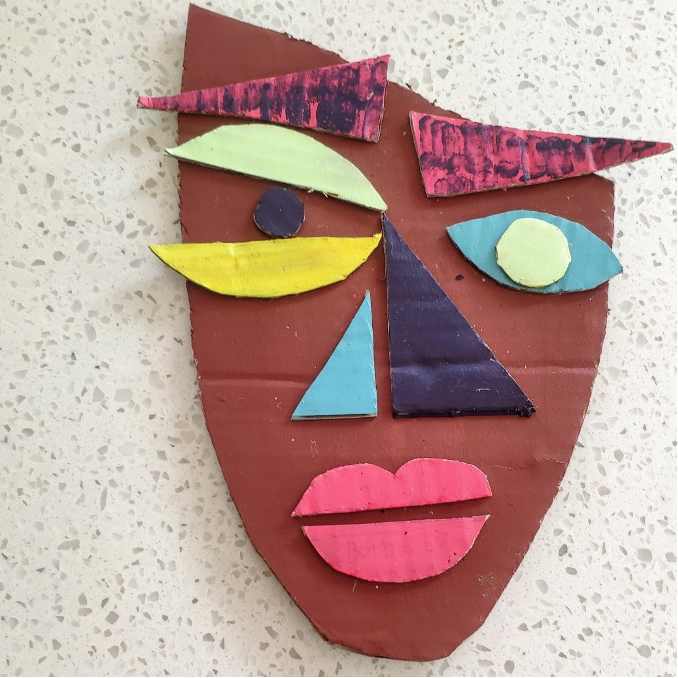
Picasso Masks
What you will need:
- Cardboard
- Paint
- Scissors
- Shape templates
Method
- Cut out templates (face. Lips, semi circles, triangles, circles)
- Map out what your face will look like
- Paint all your pieces and let dry
- Glue your cardboard face with PVA and let dry
Option: You can insert this into a frame (op shops have many second hand) or onto a handmade canvas (see our video)
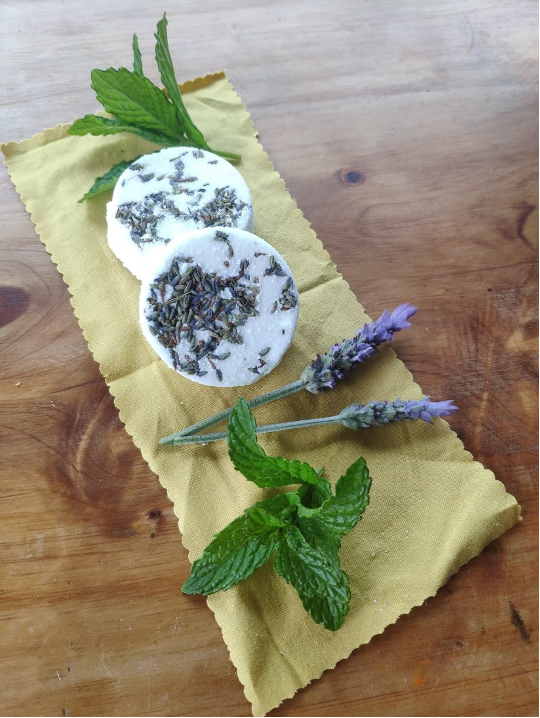
Bath Bombs
What you will need:
- Square cloth 15x15cm
- T-shirt yarn, wool, ribbon
- 1 ½ Tbsp Baking Soda
- 1 Tbsp Citric Acid
- 1 Tsp Tapioca Starch
- 1 Tsp Epsom Salts
- 2 Tsp Coconut oil with 1 drop essential oil of your choice
- Lavender Petals
- Optional: 1 drop food colouring
Method
- Place all the dry ingredients into a bowl, mix well with a spoon. (Note: Do not use hands to mix citric acid).
- Mix the coconut oil, essential oil and food colouring together before mixing it into the dry ingredients. Mix well.
- Add dry lavender petals to the mix.
- Place into the middle of the fabric and bring up opposite corners and match the sides together and make into a small parcel.
- Squeeze into a tight ball and tie off with fabric yarn, ribbon or wool. Leave to harden.
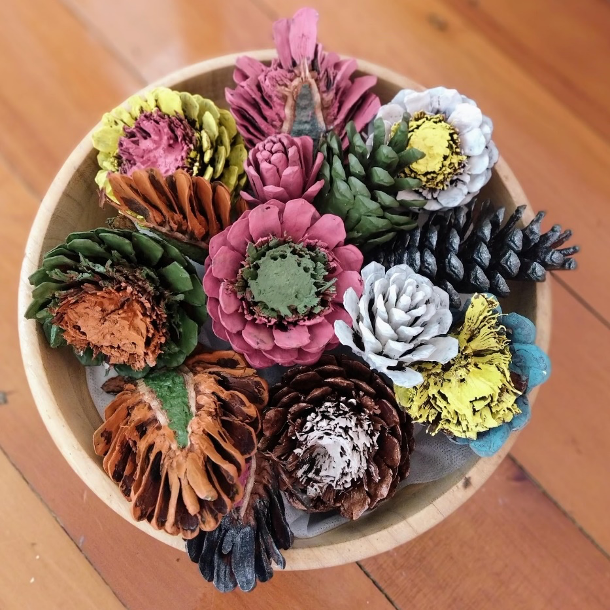
Pine Cone Bowls
What you will need:
- Pine cones
- Garden Loppers
- Secateurs
- Paint
Method
1. Using your loppers, cut your pine cone in half. Its quite hard to try and pick pine cones that are somewhat open and easy to clamp.
2. Use the secateurs to snip and even off. Repeat with all pine ones
3. Paint all your pieces and let dry
4. Insert into bowl, you may want to use mulch as a base.
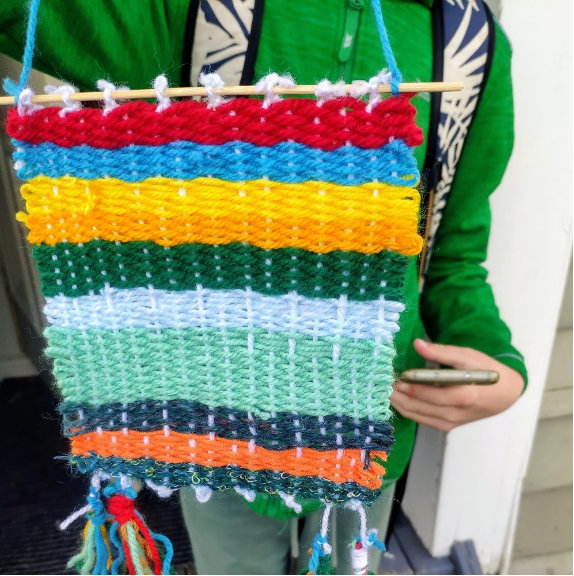
Tapestry Weaving
What you will need:
- Cardboard loom (Cardboard box, craft knife, pva glue, 2 skewers)
- Tshirts (Cut into yarn)
- Wool (2 colours)
- Fabric Scissors
Method
- Cut out a 24x30cm square from a corrugated cardboard box.
- Cut two wide strips that are 2x24cm.
- Leave a gap of 2cm away from the top and bottom of the cardboard and glue down the strips.
- Mark 15 lines/dots of 1.5cm intervals along the top and bottom of the cardboard. Using a craft knife, cut slits down each mark.
- Now that you have your cardboard loom. You will slot a skewer through the top and bottom strips, over the first and last slits. This will help stop you pulling too hard on your tshirt yarn and help reduce warping towards the middle of your tapestry.
- Cut 2cm wide strips of stretchy cotton t-shirt fabric to make your yarn. Pick t-shirt colours of your choice from your closet or an op shop.
- Slot a piece of wool into each slit, be sure each piece is at least 36cm long. Optional: Make every odd slit one colour and every second slit another colour.
- To start weaving, you want to double knot the yarn to the first strand of wool and skewer. You can weave an abstract tapestry piece by not weaving your yarn all the way to the end and create a bundle of different colours to create an image. You want to make sure that you are weaving through the bundles to connect them together and fill up the gaps. Be mindful that you are not pulling the yarn tightly.
- Once you’re done with each yarn, you want to finish off with a double knot.
- Complete the whole cardboard loom. To take the tapestry design off, you want to remove two strands of wool from the top at a time and tie them together with a double knot. Repeat on the bottom, too.
- Remove the skewers and you can use one as the hanger. Add a string to the sides of your tapestry design.