Photography by Amanda Reelick
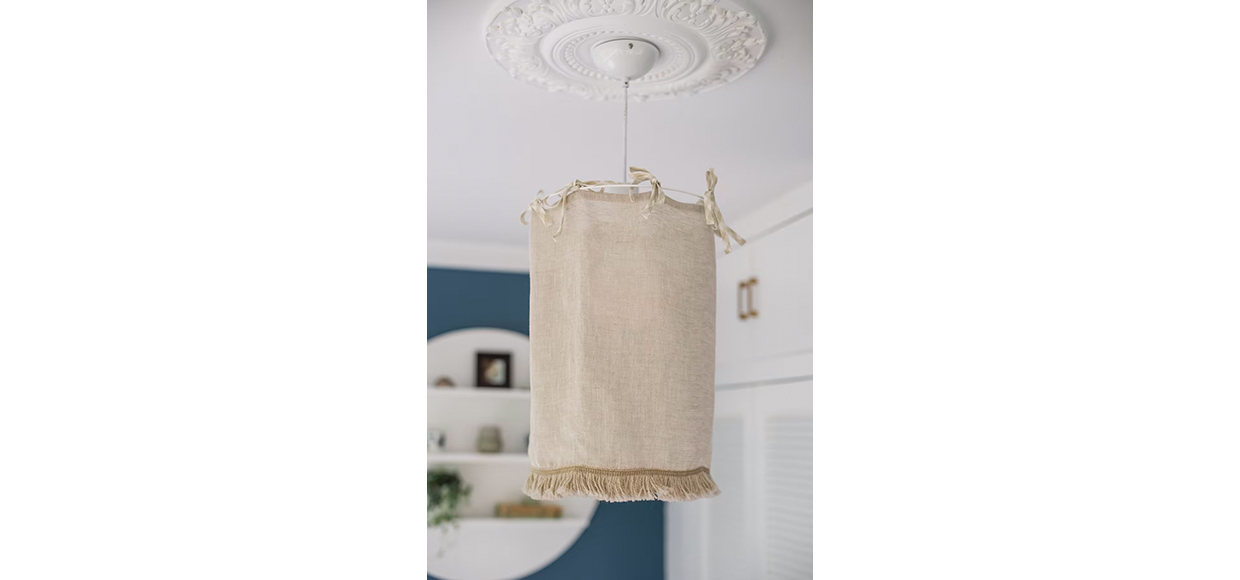
Illuminate your space with the understated elegance of a linen pendant shade.
Incorporating natural materials such as linen into our decor scheme creates a relaxed and effortlessly cool vibe which makes a room a joy to spend time in.
Already a popular choice for bedding, this textural fabric is also an ideal material for pendant shades – diffusing light and creating a soft ambience.
Choosing a neutral colour will create a spacious and calm haven, yet adding details such as ties and tassels will give this piece extra dimension.
What you’ll need:
- 150cm x 50cm piece of fabric. Light or medium weight linen (or cotton) works well
- Tape measure
- Fabric pen or chalk for marking
- Fabric scissors
- Pins
- Sewing machine
- Matching thread
- Iron
- 4 metres of bias binding for the ties, or you can make your own out of matching fabric (ours is from The Fabric Store)
- 1 metre of tassel fringing (ours is from Martha’s Furnishing Fabric)
- Lampshade ring (ours is 30cm diameter from glowandco.nz)
- Standard light fitting and bulb
Before you start
- Pre-wash the fabric to avoid shrinkage should you wish to launder the lampshade in the future.
- Measure the circumference of your lampshade ring. The easiest way to do this is by measuring the diameter of your lampshade ring and multiplying this figure by 3.14. This number will be the width that is required for your piece of fabric. An additional 4cm is needed for your seam allowance. For example, 30cm x 3.14 = 94.2cm + 4cm = 98.2cm.

Step 1: Lay down your piece of fabric and mark your width measurement on the fabric. Determine how long you would like your lampshade and mark this measurement down the length of your fabric. Our lampshade was 44cm long (final measurement was 40cm once hemmed at both top and bottom). Double check your measurements and cut out your piece of fabric.

Step 2: Create a tube with your fabric by sewing the short ends together (we will use a French seam to create a neat finish by encasing the seam). With wrong sides together, fold the fabric in half and pin the short edges together. Sew the short edges together with a 1cm seam allowance. Trim the seam in half and press to one side. Turn the fabric inside out so that the right sides are now together. Stitch again with a 1cm seam allowance, encasing the raw edge. Press the seam to one side.

Step 3: At the top of your tube, fold the fabric over by 1cm to the wrong side and iron. Fold the fabric another 1cm to enclose the raw edge, pin and sew in place. Repeat this step for the other end.

Step 4: Sew down the length of the bias binding so that it is sealed together. Cut into approximately 50cm lengths – you should have 8 ties all together. Turn each end over by 0.5cm and use a zig zag stitch to prevent fraying.

Step 5: Fold each tie in half and pin to the wrong side of your fabric at the top of your shade, lining them up with the edge of your hem. Space the ties evenly apart (approximately 12cm).

Step 6: Stitch the tie to the bottom of the hem and then another row of stitching close to the edge of the fabric.

Step 7: Pin the tassel fringing to the bottom of the lampshade on the right side of fabric, just covering the hem stitching and sew in place.

Step 8: Attach the ties around the top of the lampshade ring and attach to your light fitting.
Linen fabric and wool trim from Martha’s Furnishing Fabric, bias binding from The Fabric Store.